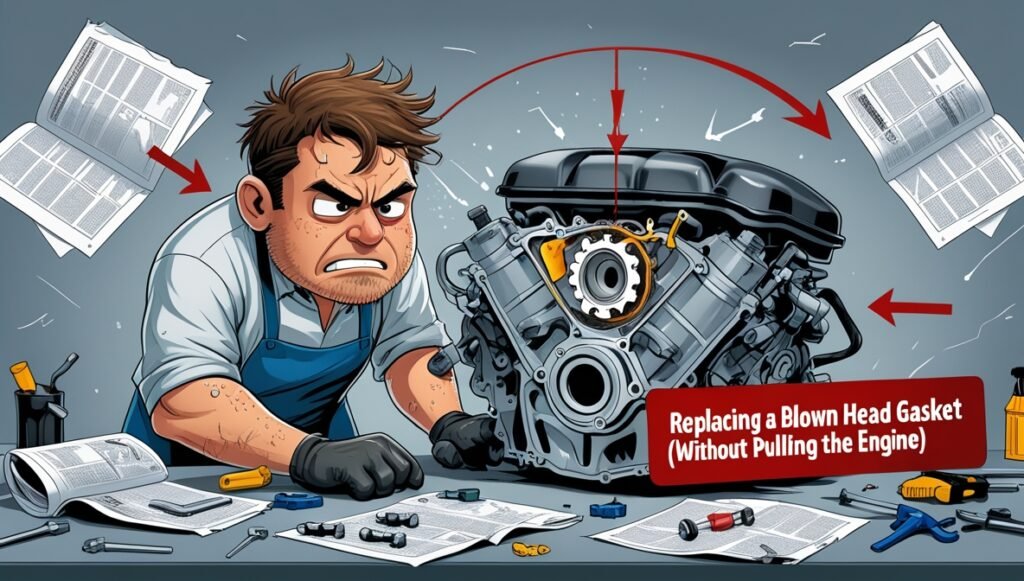
A blown head gasket is a significant issue for any car owner, but it’s one that can be tackled without pulling the engine out. If you’re ready to step up your DIY skills and save on expensive shop labor, this guide will walk you through the process.
Step 1: Recognizing the Symptoms of a Blown Head Gasket
Before you get started, it’s crucial to confirm that the head gasket is indeed the problem. Some common signs of a blown head gasket include:
Overheating: The engine runs too hot, often because of coolant leakage into the combustion chamber.
White Smoke: You’ll notice white smoke coming from the exhaust, showing coolant entering the cylinders.
Milky Oil: A thick, creamy substance on the oil cap or dipstick can show coolant mixing with engine oil.
Loss of Coolant: You may notice the coolant level dropping significantly, despite no visible leaks.
Step 2: Preparing for the Repair
Now that you’ve confirmed the head gasket issue, preparation is key to avoiding complications later. Here’s what you’ll need:
Essential Tools: Wrench set, torque wrench, socket set, gasket scraper, coolant catch pan, and a head gasket kit.
Safety Gear: Gloves, goggles, and a face mask (if handling harsh chemicals).
Replacement Head Gasket: Ensure you purchase a high-quality head gasket kit designed for your vehicle model.
Coolant and Engine Oil: You’ll need replacements for both after you finish the repair.
Preparation Checklist
For a smoother process, download our Complete Car Repair Preparation Checklist, which includes all the tools and materials you’ll need to gather.
Step 3: Removing the Old Head Gasket
Disconnect the Battery: Begin by disconnecting the battery to ensure no electrical shorts or sparks during the repair.
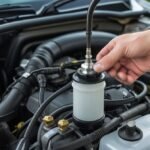
Drain the Coolant and oil: Drain the coolant into a catch pan and remove the oil. Dispose of them properly.
Remove the Components Above the Head Gasket: This includes the intake manifold, exhaust manifold, and valve cover. Keep track of all nuts and bolts as you remove each component.
Loosen the Head Bolts: Using a torque wrench, begin loosening the head bolts in a specific sequence (usually a spiral pattern starting from the outermost bolts). This is critical to avoid warping the cylinder head.
Lift the Cylinder Head: Once the bolts are removed, carefully lift the cylinder head off. This might require a little wiggling, but make sure not to damage any surrounding parts.
Tip: Always double-check your head gasket kit to make sure the new gasket aligns correctly with the manufacturer’s specifications.
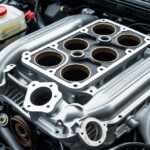
Step 4: Inspecting the Cylinder Head and Block
Before placing the new gasket, check both the cylinder head and the engine block for any damage:
Cracks: A hairline crack in either component could lead to further damage and failure after the repair.
Warping: If the cylinder head is warped, resurface it before proceeding with the repair.
If you’re uncertain about the condition of your components, download our Engine Inspection Guide for a detailed look at what to check.
Step 5: Installing the New Head Gasket
Clean the Surface: Thoroughly clean both the cylinder head and engine block using a gasket scraper to remove any old gasket material. Ensure both surfaces are smooth and free from debris.
Place the New Head Gasket: Carefully place the new head gasket on the engine block. Make sure it’s positioned correctly before.
Reinstall the Cylinder Head: Place the cylinder head back onto the engine block, ensuring that the gasket stays in place.
Tighten the Head Bolts: Using a torque wrench, tighten the head bolts in the recommended sequence and to the manufacturer’s specified torque. This is crucial to ensure an even seal.
Pro Tip: For a thorough guide on torque specifications and tightening sequences, check out our Torque Spec Guide for Car Repairs.
Step 6: Reassembling the Components
Once the new head gasket is in place, reassemble the components you removed, including the intake manifold, exhaust manifold, and valve cover. Don’t forget to replace any worn gaskets or seals during this process.
Replace Coolant and Oil: Refill the engine with fresh coolant and oil to ensure everything is running smoothly.
Step 7: Testing the Repair
Reconnect the Battery: Reconnect the battery and start the engine. Let it run for a few minutes, then check for leaks around the cylinder head.
Monitor Engine Temperature: monitor the temperature gauge to ensure the engine doesn’t overheat.
Check for Smoke: monitor the exhaust to ensure that white smoke is no longer visible.
If you’re unsure whether your repair was successful, download our Post-Repair Inspection Checklist to guide you through the last checks.
When to Seek Professional Help
While this guide helps you tackle a blown head gasket without pulling the engine, some situations might require professional intervention:
Severe engine block or cylinder head damage.
Difficulty with removing stubborn bolts or damaged parts.
If you find yourself in over your head, it might be time to consider hiring a professional. However, for most DIYers, this guide provides all the steps to perform a successful repair.
Additional Resources:
DIY Car Repair Guide: For more advanced car repair tips, check out our Ebook.
Tool Starter Kit Checklist: Make sure you have the right tools for this repair with our comprehensive checklist.
Printable Repair Guides: Access our printable guides for other repairs around the car or home.
By following these steps, you can tackle the daunting task of replacing a blown head gasket without pulling the engine. With the right tools and a bit of patience, you’ll save both time and money while gaining new skills. If you’re looking for more DIY car repair tips and tricks, check out our full range of resources!