Have you ever flipped a switch, only to find that nothing happens? Maybe your lights suddenly went out, or certain appliances stopped working. If you’ve ruled out the power supply and suspect a faulty circuit breaker, you’re not alone. A tripped or malfunctioning circuit breaker is a common household issue, but the good news is you can often repair or reset it yourself with no need to call an electrician. In this “Fix It Fast” guide, I’ll walk you through how to repair a faulty circuit breaker in under 20 minutes.
Why Circuit Breakers Trip or Fail?
Before diving into the repair process, it’s helpful to understand why circuit breakers trip or fail. Circuit breakers protect your electrical system from overloads, short circuits, and other electrical issues by cutting off power to specific circuits. While this is an important safety feature, it can sometimes cause problems if the breaker trips too frequently or cannot reset. Here are some common reasons for a faulty circuit breaker:
Overloaded Circuit: If too many devices are plugged into a single circuit, it can cause the breaker to trip to prevent overheating or fire hazards.
Short Circuit: A short circuit occurs when an electrical current flows along an unintended path, often because of faulty wiring or a malfunctioning appliance.
Faulty Breaker: Sometimes the breaker itself can wear out or fail because of age or internal damage, leading to issues even if there is no overload or short circuit.
Ground Fault: This occurs when a live wire touches a grounded surface, which can trip the breaker.
Tools and Materials You’ll Need
Fixing a faulty circuit breaker is a relatively simple process, but you’ll need a few basic tools to ensure the repair is done safely and effectively. Here’s what you’ll need:
Screwdriver: To open the electrical panel and access the circuit breakers.
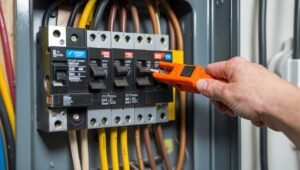
Voltage Tester: To confirm whether there is still power flowing to the circuit before you begin work.
Replacement Circuit Breaker: If the breaker is faulty and needs to be replaced.
Rubber Gloves: For added protection when working with electrical components.
Flashlight: In case you’re working in a dimly lit area or need extra light to see the electrical panel clearly.
Recommended Products:
Voltage Tester: Check it out on Amazon
Replacement Circuit Breaker: Buy it here on Amazon
Step-by-Step Guide to Repair a Faulty Circuit Breaker in Under 20 Minutes
Step 1: Turn Off the Main Power Supply
Before you work on your circuit breaker, it’s crucial to ensure your safety. The first step is to turn off the primary power supply to your home. Locate the main circuit breaker at the top of the electrical panel and flip it to the “off” position. This will cut the power to all circuits and protect you from electrical shock while you’re working.
Tip: Always wear rubber gloves to prevent any accidental contact with live wires.
Step 2: Open the Electrical Panel
After turning off the main power, open the electrical panel to access the individual circuit breakers. Use a screwdriver to remove the screws holding the panel cover in place. Once the panel is open, you should be able to see the individual circuit breakers.
Warning: If you’re unsure about working around electricity, or if your electrical panel is outdated, it’s always best to consult with a licensed electrician.
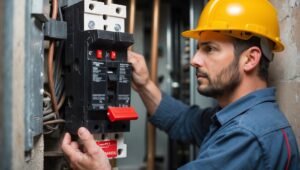
Step 3: Identify the Faulty Circuit Breaker
Now that you have access to the circuit breakers, identify the one that is malfunctioning. Typically, a faulty circuit breaker will either be in the “off” position or “tripped” (some breakers will show a red or orange indicator when tripped). If the breaker is simply in the “off” position, it may have been manually turned off because of an overload, and you may just need to reset it. However, if the breaker is still faulty, it may need to be replaced.
Tip: Make a note of which circuit breaker is malfunctioning so you can address it properly.
Step 4: Reset the Breaker
If the breaker appears to be tripped and isn’t showing signs of internal damage, you can try resetting it. To reset the breaker:
Flip the breaker to the “off” position first.
Then, flip it back to the “on” position. You should feel a slight click when the breaker is properly reset.
Tip: If the breaker immediately trips again when you turn it on, this could show a deeper issue, such as a short circuit, and you’ll need to investigate further.
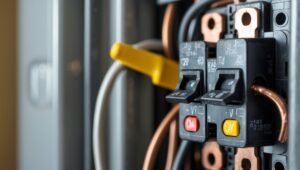
Step 5: Replace the Circuit Breaker (If Necessary)
If the breaker doesn’t reset or keeps tripping, it may need to be replaced. Here’s how to do that:
Remove the Faulty Breaker: use a screwdriver to carefully unscrew the faulty breaker from its position in the electrical panel.
Disconnect the Wires: Once the breaker is loose, disconnect the wires attached to it. Note where each wire is connected.
Install the New Breaker: Attach the new circuit breaker in place by connecting the wires to the new breaker, making sure each wire is properly connected.
Screw the Breaker Back Into Place: Once the wires are securely connected, screw the new breaker back into place.
Tip: Always ensure that you’ve purchased a breaker that matches the amperage rating of your circuit. Using the wrong amperage can cause electrical hazards.
Step 6: Turn the Power Back On
Once the new breaker is in place or the faulty breaker has been reset, you can turn the power back on. Flip the main power supply switch back to the “on” position, then check the repaired circuit breaker to make sure it’s functioning correctly. If the lights come on or your appliances work again, the issue has been resolved.
Step 7: Test the Circuit
Finally, test the circuit to ensure that the issue has been fully resolved. Turn on the devices or lights connected to the repaired circuit. If the circuit remains stable and no further issues arise, the repair was successful.
Prevent Future Circuit Breaker Issues
Once you’ve fixed your faulty circuit breaker, here are a few tips to prevent future problems:
Don’t Overload Circuits: Avoid plugging too many devices into one circuit, as this can cause the breaker to trip.
Check for Wiring Issues: If your breaker trips frequently, there may be an underlying wiring problem. Have a professional electrician inspect your wiring.
Replace Old Breakers: Circuit breakers wear out over time. If you have older breakers in your panel, consider replacing them proactively to avoid unexpected failures.
Finally
Fixing a faulty circuit breaker is a relatively simple task that can save you time, money, and stress. Whether you simply need to reset the breaker or replace it entirely, these simple steps will help you restore power to your home quickly. However, always prioritize safety when working with electricity, and if you ever feel unsure, call in a licensed electrician.
For more DIY electrical tips and home repair advice, check out our premium books:
Download Behind the walls finds fixing electrical problems. Click it here.
My Handy Man, Get your copy here
By learning how to handle issues like a faulty circuit breaker, you can take control of your home’s electrical system and avoid unnecessary repair costs.