Have you ever experienced the frustration of standing in water as you wash your face or brush your teeth? A clogged bathroom sink drain can disrupt your daily routine, and if left untreated, it can lead to water damage, mold growth, and even costly plumbing bills. Fortunately, unclogging a bathroom sink drain doesn’t have to be a complicated or expensive task. With just a few basic tools and a little patience, you can fix the issue in under 10 minutes.
In this guide, I’ll walk you through the process of unclogging your bathroom sink drain. By the end of this post, you’ll be able to tackle this common household issue with confidence, saving both time and money. Let’s get started!
Why Does a Bathroom Sink, Get Clogged?
Before diving into the solution, it’s important to understand why your bathroom sink drain might be clogged. Over time, your drain can accumulate a variety of substances that cause blockages. The most common culprits include:
Hair: As we wash our hair or shave, strands can fall down the drain. Combined with soap, toothpaste, or other bathroom products, hair can create a thick, sticky mass that restricts water flow.
Soap Scum: Soap residue can build up over time, especially if you use bar soap, which doesn’t dissolve as easily as liquid soap. This can coat the inside of your pipes and contribute to clogs.
Toothpaste and Other Debris: Small amounts of toothpaste, shaving cream, or dirt can find their way into the drain. Over time, these items collect and form a clog.
Understanding the problem can help you troubleshoot effectively and prevent future clogs.
Tools You’ll Need
Before you begin, grab a few simple tools that will make the job easier. These include:
Plunger: The most common tool for clearing clogs. A plunger creates pressure that can dislodge the blockage.
Baking Soda and vinegar: A natural solution to break down debris inside the pipes.
Drain Snake: For tougher blockages, that won’t budge with a plunger or cleaning solution.
Rubber Gloves: For hygiene when working around the drain.
Towels: To keep the area dry and clean.
Step 1: Remove Visible Debris
The first step is to assess the situation. Look at the drain to see if there’s any visible debris. Often, bathroom sinks can become clogged with hair, soap, or toothpaste residue that has collected around the drain opening. If you see anything that’s blocking the water, grab a pair of tweezers or your hands (while wearing rubber gloves) and carefully remove the debris.
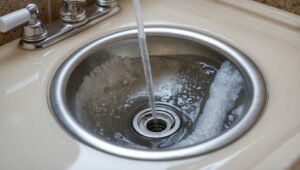
Step 2: Try Using a Plunger
Once the visible debris is removed, it’s time to try using a plunger. A plunger works by creating a suction that can dislodge the clog. Here’s how you can use it effectively:
Fill the sink with a few inches of water to cover the rubber part of the plunger. If the sink isn’t already filled with water, run the tap until the plunger is submerged.
Place the plunger directly over the drain, ensuring that it forms a tight seal.
With firm pressure, push the plunger down and then pull up sharply. Repeat this motion 10-15 times.
After a few attempts, check to see if the water drains properly. If it does, congratulations—you’ve solved the problem!
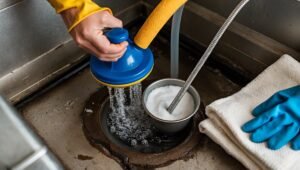
Step 3: Baking Soda and Vinegar Solution
If the plunger didn’t work, the next method I recommend is using a natural cleaning solution made of baking soda and vinegar. This combination is a powerful way to break down organic material, soap scum, and minor blockages in the pipes. Plus, it’s an eco-friendly option that won’t damage your plumbing.
Start by pouring half a cup of baking soda down the drain.
Follow this with half a cup of vinegar. You should see it fizz up immediately, which is a sign that the reaction is working.
Let the mixture sit in the drain for 10-15 minutes. During this time, it will break down debris and dissolve the clog.
After the waiting period, rinse the drain with hot water for 2-3 minutes to flush out the debris.
Tip: This method works best for small to medium clogs. For stubborn blockages, you might need to use additional tools.
Step 4: Use a Drain Snake
If the clog persists after using the plunger and baking soda solution, it’s time to bring in a drain snake. A drain snake, or plumber’s auger, is a long, flexible tool that can reach deep into the pipes to break up tough clogs. Here’s how to use it:
Insert the end of the drain snake into the drain opening.
Turn the handle to feed the snake down into the pipes. You’ll feel resistance when it hits the clog.
Once the snake reaches the blockage, rotate it to break up the debris.
After the snake has dislodged the clog, pull it out of the drain and clean it off.
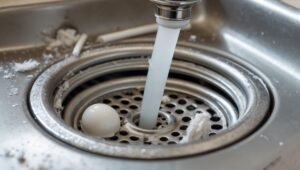
Rinse the drain with hot water to flush out the remaining debris.
Step 5: Prevent Future Clogs
Once you’ve successfully unclogged the drain, it’s important to prevent future clogs from occurring. Here are a few things you can do:
Install a Drain Strainer: A drain strainer will catch hair, soap, and debris before it enters the pipes, preventing clogs from forming.
Regular Cleaning: Once a month, use the baking soda and vinegar method to keep your pipes clean and free of buildup.
Avoid Flushing Non-Flushable Items: Don’t let toothpaste, shaving cream, or hair go down the drain. Dispose of them in the trash instead.
In Concluding
Unclogging a bathroom sink drain is a task that every homeowner can handle with just a few simple tools. By following these steps, you’ll be able to clear the drain in under 10 minutes and prevent future clogs from happening. The best part is, with just a little of elbow grease, you’ll save money and avoid costly plumbing services.
For more DIY home repair tips, be sure to check out our premium DIY books:
Fix It Before It Breaks: A DIY Prevention and Repair Handbook Find it here
DIY Story Book for Beginners, Check out If My Hands Could Speak, Book 1. Get your copy here
With the right knowledge and tools, you can tackle all your plumbing problems and keep your home in great shape. Now that you know how to unclog a bathroom sink, fix it fast!